Are your yoga pants just a bit too long, dragging on the floor or bunching up at your ankles? You don’t need a sewing machine or a trip to the tailor to fix them.
Hemming your yoga pants by hand is easier than you think—and it saves you time and money. In this guide, you’ll learn simple, step-by-step methods to shorten your pants neatly and securely, even if you’ve never sewn before. Ready to get the perfect fit and feel confident wearing your favorite yoga pants?
Keep reading and discover how hand-sewing can transform your wardrobe in no time.
Credit: www.rexingsports.com
Prepare Your Workspace
Preparing your workspace is the first step to hem yoga pants by hand. A clean and organized area helps you work faster and avoid mistakes. Set up everything you need before starting. This will make the process smooth and enjoyable. Take time to gather tools and choose a comfortable spot. These small steps save effort and improve results.
Gather Tools And Materials
Collect all tools before you begin. You will need a needle, thread matching your pants, scissors, pins, and a measuring tape. A thimble can protect your finger while sewing. Having all materials ready prevents interruptions. It also helps you focus on hemming your yoga pants carefully.
Select A Comfortable Area
Choose a well-lit and quiet space to work. Good lighting lets you see stitches clearly. A flat surface like a table or desk is ideal for pinning and cutting fabric. Make sure you can sit comfortably for some time. Avoid places with distractions to keep your focus. A calm area makes hand sewing easier and more precise.

Credit: www.youtube.com
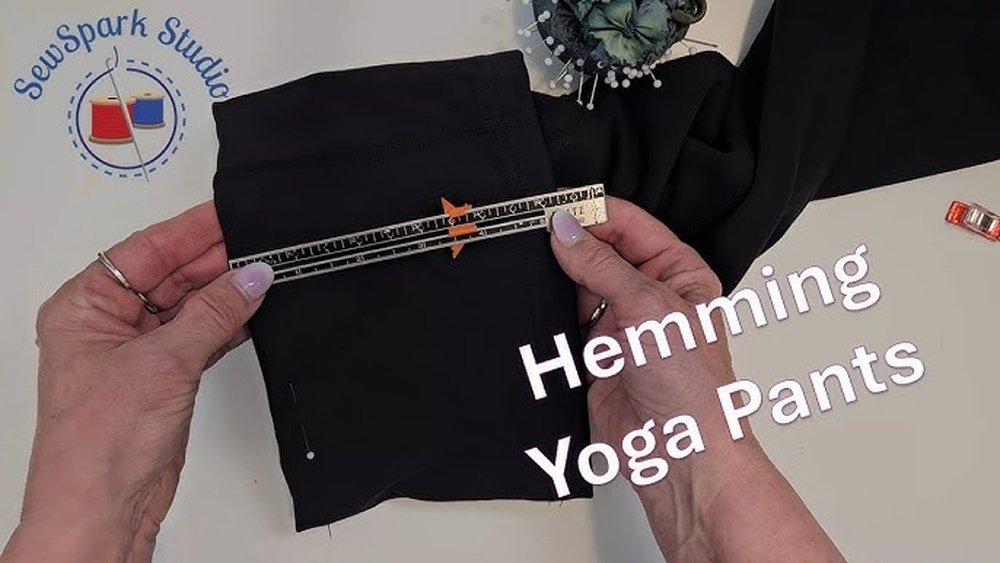
Measure And Mark Length
Measuring and marking the length is the first key step to hem yoga pants by hand. This step ensures the pants fit perfectly and look neat. Take your time to get the right length before cutting or sewing.
Accurate measurement helps avoid mistakes that waste fabric. Marking clearly makes sewing easier and more precise. Follow these simple actions to measure and mark the hemline accurately.
Wear And Pin The Pants
Put on the yoga pants and stand straight. Make sure you wear the shoes you usually use with the pants. This shows the true length you need.
Ask someone to help pin the pants at the desired length. If alone, fold the fabric at the leg opening to the length you want. Use straight pins to hold the fold in place. Pin evenly all around the leg for a consistent hem.
Mark Desired Hemline
Take off the pants carefully without moving the pins. Use tailor’s chalk or a fabric marker to draw a clear line along the pinned edge.
Mark both legs to the same length by measuring from the bottom edge to the mark. Double-check the marks to keep the hems even. This line shows where you will fold and sew the fabric.
Cut Excess Fabric
Cutting excess fabric is an important step in hemming yoga pants by hand. Removing the extra length makes the pants fit perfectly. This step requires care to avoid mistakes. Cutting too much fabric can ruin the pants. Cut slowly and follow the marked line for best results.
Remove Pants Carefully
Take off the yoga pants gently after marking the new length. Avoid stretching or pulling the fabric. Lay the pants flat on a smooth surface. This helps keep the fabric steady. A steady fabric makes cutting easier and more accurate. Double-check the marks before cutting to prevent errors.
Trim Along Marked Line
Use sharp fabric scissors for a clean cut. Cut slowly along the marked line. Keep your scissors straight and steady. Cutting in small, careful snips improves accuracy. Avoid cutting beyond the line. Leave a small seam allowance if needed for folding and sewing. This extra fabric helps create a neat hem.
Fold And Pin Hem
Folding and pinning the hem is the key step to get a neat edge on your yoga pants. This process sets the foundation for sewing by hand. It ensures the fabric stays in place and the hem looks tidy.
Take your time to fold the fabric evenly. Pinning the hem securely keeps everything aligned. This step stops the fabric from shifting as you sew.
Create A Clean Fold
Start by turning the pants inside out. Fold the bottom edge up to the desired length. Use a ruler or measuring tape for accuracy. Smooth out any wrinkles or bumps in the fabric. Press the fold with your fingers to make a sharp crease. This crisp fold helps the hem look professional and even.
Secure With Pins
Take straight pins and insert them perpendicular to the fold. Space the pins about one to two inches apart. Pin through both layers of fabric to hold the fold tight. Check that the fabric is flat and smooth. Avoid pinning too close to the edge to prevent fabric damage. The pins keep the hem stable for easy and precise hand stitching.
Choose Stitch Type
Choosing the right stitch type is essential when hemming yoga pants by hand. The fabric of yoga pants is stretchy and delicate. Using the correct stitch helps keep the hem flexible and strong. It also prevents the stitches from breaking when you move or stretch. Picking the right stitch type ensures a neat, durable finish that looks professional.
Use Stretch-friendly Stitches
Stretch-friendly stitches allow the fabric to move without breaking the thread. A common choice is the zig-zag stitch. This stitch stretches with the fabric and holds the hem firmly. You can also use a stretch backstitch for extra strength. These stitches keep your yoga pants comfortable and prevent puckering or gaps.
Simple Stitches For Beginners
Beginners should try easy hand stitches like the running stitch. It is quick and simple to learn. Sew small, even stitches close to the fabric edge. Another option is the slip stitch, which hides the thread inside the hem. These stitches work well for small adjustments and keep your hem tidy.
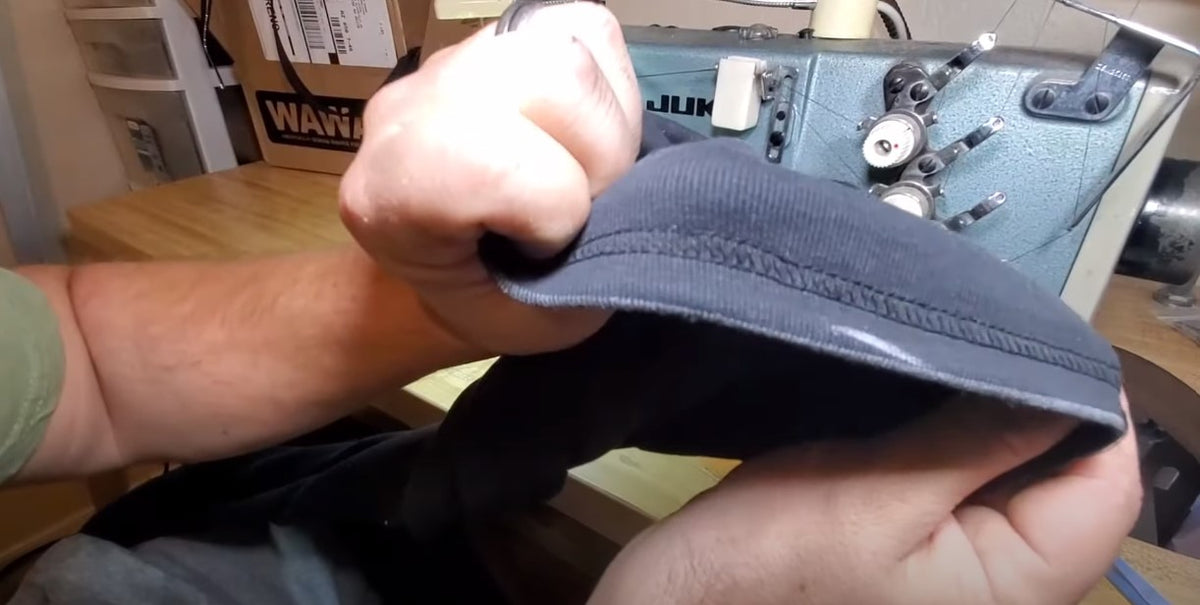
Hand Sewing The Hem
Hand sewing the hem of yoga pants is a simple, effective way to get a perfect fit. It allows you to adjust the length without using a sewing machine. This method keeps the fabric stretchy and comfortable. Follow these steps for a neat, durable hem.
Thread The Needle
Choose a thread that matches your yoga pants color. Cut a piece about 18 inches long. Thread the needle and tie a small knot at the end. This keeps the thread from slipping out while sewing.
Sew Even Stitches
Start sewing from the inside of the hem. Make small, even stitches about 1/8 inch apart. Keep the stitches close to the fold for a clean look. Avoid pulling the thread too tight to prevent puckering.
Maintain Fabric Stretch
Yoga pants fabric is stretchy, so your stitches must stretch too. Use a gentle hand and do not pull the fabric tight. Slightly stretch the fabric as you sew to keep its flexibility. This helps the hem move with you comfortably.
Finish And Secure Thread
Finishing and securing the thread is the last step in hemming your yoga pants by hand. This step ensures your stitches stay strong and your hem does not unravel. Taking time to finish well makes your sewing look neat and professional.
Properly securing the thread also prevents loosening during wear or washing. It keeps the hem intact, so your yoga pants last longer. Follow these simple steps to tie off and hide your thread ends cleanly.
Tie Off Thread Ends
After stitching, pull the thread gently but firmly to remove slack. Make a small loop with the thread close to the fabric. Pass the needle through this loop and pull tight to create a knot.
Repeat the knotting 2 or 3 times for extra security. Cut the thread close to the knot, leaving a tiny tail. This prevents the knot from coming undone over time.
Hide Knots Neatly
To hide knots, insert the needle under a few stitches inside the hem. Pull the thread through this path to hide the knot inside the fold. This keeps the outside of your hem smooth and clean.
Trim any extra thread close to the fabric after hiding it. Avoid pulling too hard to keep the fabric flat and undamaged. Hidden knots give your yoga pants a polished, finished look.
Press And Set The Hem
Pressing and setting the hem is a key step in hemming yoga pants by hand. It helps create a neat, flat finish that looks professional. Proper pressing ensures the fabric stays in place and makes sewing easier. This step also prevents the hem from puckering or twisting after sewing.
Using the right heat and smoothing out wrinkles are important parts of pressing the hem. These actions prepare the fabric for stitching and help keep the hem crisp and clean.
Use An Iron With Appropriate Heat
Choose an iron setting that matches your yoga pants fabric. Most yoga pants are made from stretchy materials like spandex or polyester blends. Set your iron to a low or medium heat to avoid damage. Always check the fabric label for the recommended temperature.
Use steam if your iron has that option. Steam helps relax the fabric fibers and makes folding easier. Avoid pressing too long in one spot to prevent shiny marks or burns.
Smooth Out Wrinkles
Before pressing, gently smooth the fabric with your hands. Remove any creases or folds along the hemline. Lay the pants flat on an ironing board for best results.
Use the iron to carefully press the folded hem. Move the iron slowly and evenly to set the fold. This step helps the fabric stay folded while you sew by hand. The result is a clean, polished hem that lasts.
Tips For A Perfect Fit
Getting the perfect fit for your yoga pants is key to comfort and style. Taking time with your hem ensures the pants feel just right. Small adjustments can make a big difference in how they look and move with you.
Here are simple tips to help you achieve a neat, well-fitted hem by hand. Follow these steps to avoid common mistakes and enjoy your yoga pants more.
Test Fit Before Final Sewing
Wear the yoga pants after folding the hem but before sewing. Check how the length feels when you sit, stand, and stretch. Make sure the pants do not drag on the floor or ride up too high. Pin the hem carefully and move around to see if it stays in place. Testing helps avoid mistakes and saves time.
Adjust Hem If Necessary
If the fit is not perfect, adjust the hem by folding a little more or less fabric. Use pins to hold the new fold and try the pants again. Repeat this step until you feel comfortable with the length. Only sew when you are sure about the fit. This step keeps your yoga pants looking tidy and feeling great.

Credit: www.rexingsports.com
Frequently Asked Questions
Can You Hem Yoga Pants By Hand?
Yes, you can hem yoga pants by hand using a stretch stitch or small zig-zag stitches to maintain flexibility. Measure, fold, pin, and sew carefully for a neat finish.
How To Shorten Yoga Pants Without Sewing?
Fold yoga pants to desired length and mark. Insert no-sew hemming tape inside the fold. Press with a hot iron using a cloth. Let it cool to secure. Repeat if needed for extra hold. This method shortens pants quickly without sewing.
What Is The Best Stitch To Hem Yoga Pants?
The best stitch to hem yoga pants is a zig-zag stitch. It stretches with the fabric and prevents breakage.
How To Hem Pants By Hand Without Cutting For Beginners?
Fold the pants to the desired length without cutting. Pin the fold securely. Sew with small, tight invisible stitches along the hem. Pull thread tight to secure. Align seams carefully for a neat finish. This method keeps the original hem intact and fits perfectly.
Conclusion
Hemming yoga pants by hand is simple and saves money. Take your time measuring and folding carefully. Use small, even stitches for a neat finish. Hand sewing lets you adjust the length perfectly. Now, your yoga pants fit better and look great.
Try this easy skill for a quick clothing fix. Practice will help you sew faster and cleaner. Enjoy wearing your customized yoga pants with confidence.