Yoga Poses On One Leg: Mastering Balance And Strength
Practicing yoga on one leg might look simple, but it is one of the best ways to develop balance, focus, and strength. These poses are not just about standing still—they test your mind, muscles, and even your patience. If you have ever tried to stand on one leg for more than a few seconds, you know how quickly your body can start to wobble.
But with practice, these postures can help you improve stability, coordination, and even mental clarity.
Why are one-legged yoga poses so popular? Because they challenge both beginners and advanced practitioners. Whether you want better balance for sports, improved posture, or a calmer mind, standing on one leg in yoga offers unique benefits. Many people also find these poses rewarding because progress is easy to notice.
At first, you might fall out of the pose often. But after a few weeks, you’ll stand taller, feel stronger, and maybe even impress your friends.
Let’s dive into the world of yoga poses on one leg, exploring how they work, which ones to try, and how to get the most from your practice.
The Science Behind One-legged Yoga Poses
Balancing on one leg is not just about strong legs. Your core muscles, ankles, and even your toes work together to keep you steady. Research shows that single-leg balance training improves not only physical stability but also proprioception—your body’s sense of its own position in space. This is especially important for preventing falls as people get older.
A study from the Journal of Strength and Conditioning Research found that practicing balance exercises for just six weeks can reduce the risk of ankle sprains by nearly 40%. This is why athletes, dancers, and even physical therapists often include these moves in their routines.
One-legged yoga poses also boost concentration. You cannot balance well if your mind is jumping from thought to thought. Many people notice that after a few minutes of balancing, they feel calmer and more focused for the rest of the day.
Essential Benefits Of One-leg Yoga Poses
Standing on one leg in yoga is much more than a physical exercise. Here are some of the key benefits:
- Improved Balance: One-legged poses train your body to stay steady and react quickly to changes.
- Stronger Legs and Core: These poses activate deep muscles that are hard to reach with regular workouts.
- Better Posture: Holding these poses teaches your body to align properly, which can help prevent back and neck pain.
- Mental Focus: Staying balanced demands attention, helping to clear your mind and reduce stress.
- Injury Prevention: By improving your balance and strengthening small stabilizing muscles, you reduce your risk of injuries in daily life.
One common mistake beginners make is thinking balance comes only from strong legs. In reality, your core and even your eyesight play a big role. Another easy-to-miss tip: practicing barefoot helps your feet grip the ground and improves stability faster.
Most Popular One-legged Yoga Poses
Let’s look at some of the most common and effective one-legged poses in yoga. Each pose has its own unique benefits and level of difficulty, so you can find the right challenge for your practice.
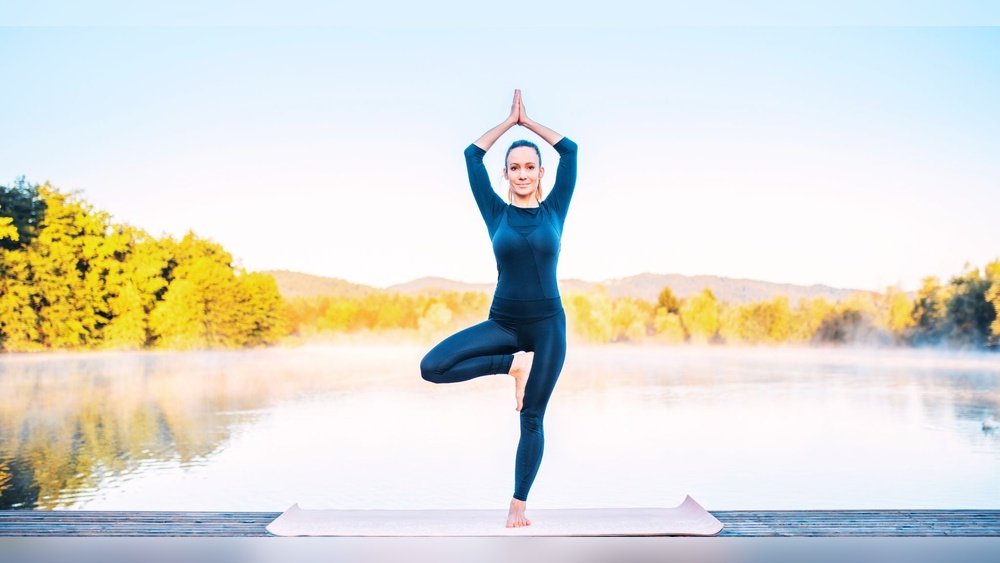
1. Tree Pose (vrikshasana)
Tree Pose is often the first one-legged pose people learn. Stand tall, place one foot against the opposite leg’s inner thigh or calf (never on the knee), and bring your hands together at your chest or overhead. This pose improves balance and strengthens your ankles.
2. Eagle Pose (garudasana)
In Eagle Pose, you wrap one leg around the other and cross your arms in front of you. This pose improves focus, stretches the upper back, and strengthens the legs.
3. Dancer’s Pose (natarajasana)
Dancer’s Pose is a deep backbend while balancing on one leg. Hold your ankle behind you and reach your other arm forward. It’s great for flexibility, focus, and leg strength.
4. Warrior Iii (virabhadrasana Iii)
In Warrior III, you balance on one leg while leaning forward and extending your arms and other leg. This pose builds strength in the standing leg, core, and back.
5. Half Moon Pose (ardha Chandrasana)
For Half Moon Pose, stand on one leg, reach one hand to the ground, and extend your other arm and leg upwards. This pose opens the hips and strengthens the side body.
6. Standing Figure Four (eka Pada Utkatasana)
Sit back as if in a chair, cross one ankle over the opposite knee. This pose is great for stretching the hips and building balance.
7. Standing Big Toe Hold (utthita Hasta Padangusthasana)
Stand tall, grab your big toe with your hand, and stretch your leg forward or to the side. This pose increases leg flexibility and balance.
8. Standing Split (urdhva Prasarita Eka Padasana)
Lean forward and lift one leg up behind you. This intense hamstring stretch also challenges your balance.
9. Revolved Half Moon (parivrtta Ardha Chandrasana)
A twist on the regular Half Moon Pose, this version adds a spinal twist and extra core work.
10. One-legged Chair Pose (eka Pada Utkatasana)
Balance on one foot while sitting back into a chair position. It’s a fiery pose for the thighs and glutes.
11. Airplane Pose (dekasana)
Similar to Warrior III, but with arms stretched out to the side like airplane wings. This pose helps with stability and body awareness.
12. One-legged Mountain Pose (eka Pada Tadasana)
Stand tall and lift one knee towards your chest. This simple pose is great for warming up the body and practicing balance.
13. One-legged Crow Pose (eka Pada Bakasana)
An advanced arm balance, shifting weight onto your hands with one knee on the upper arm and the other leg extended back. It builds strength and confidence.
14. Lord Of The Dance Pose (natarajasana Variation)
A deeper version of Dancer’s Pose, sometimes holding the foot with both hands for a bigger stretch.
15. Standing Hand-to-big-toe Pose (supta Padangusthasana Variation)
Lifting the leg straight up while standing and grabbing the big toe. It’s excellent for flexibility and control.
Comparison Of Key Poses: Balance Difficulty And Muscles Targeted
Here’s a useful comparison of some popular one-legged poses, helping you choose based on your goals:
| Pose | Balance Difficulty (1-5) | Main Muscles Worked |
|---|---|---|
| Tree Pose | 2 | Ankles, Core, Thighs |
| Warrior III | 4 | Hamstrings, Glutes, Back |
| Dancer’s Pose | 4 | Quadriceps, Core, Back |
| Standing Figure Four | 3 | Glutes, Hips, Ankles |
| Half Moon Pose | 5 | Obliques, Glutes, Ankles |

Credit: www.weeviews.com
How To Improve Balance In One-legged Poses
If you find yourself wobbling or falling out of these poses, you’re not alone. Here are some practical tips to help you build a stronger, steadier balance:
- Focus Your Gaze: Pick a spot on the floor or wall and keep your eyes fixed on it.
- Engage Your Core: Pull your belly in slightly to activate deep abdominal muscles.
- Spread Your Toes: Press them firmly into the ground for better stability.
- Use Props: A wall or chair can help you learn the pose safely.
- Practice Both Sides: Always repeat the pose on your weaker side, too.
A non-obvious insight: practicing on an uneven surface (like a yoga mat folded in half) can speed up your progress, forcing your muscles to adjust even more.
Modifications And Progressions
Not every pose fits every body. Here’s how you can modify or advance your practice:
- Beginners: Start with Tree Pose or Standing Mountain Pose. Use the wall for support.
- Intermediate: Try Dancer’s Pose or Warrior III, using a yoga block under your hand for extra balance.
- Advanced: Move to Half Moon or One-Legged Crow. Try closing your eyes for extra challenge (but only if you’re safe).
If you struggle with flexibility, use a yoga strap to hold your foot in poses like Standing Big Toe Hold.
Common Mistakes In One-legged Yoga Poses
Even experienced yogis make mistakes. The most frequent errors include:
- Letting the standing knee collapse inwards, which can strain the joint.
- Holding the breath—instead, keep breathing slowly and deeply.
- Staring at moving objects or mirrors, which can throw off your balance.
- Forgetting to engage the core.
- Skipping the weaker side, which creates muscle imbalances.
An easy-to-miss tip: balance improves faster if you practice daily, even for just 2-3 minutes per side.
One-legged Yoga In Different Yoga Styles
You’ll find one-legged poses in almost every major yoga style, but each uses them a bit differently.
- Hatha Yoga: Focuses on holding these poses for longer to build strength and concentration.
- Vinyasa Yoga: Flows from one pose to another, often linking one-legged poses together for a dynamic challenge.
- Iyengar Yoga: Uses props to help achieve proper alignment, making one-legged poses accessible for all levels.
- Power Yoga: Emphasizes strength and stamina, with advanced balancing sequences.
Here’s a quick overview:
| Yoga Style | Approach to One-Legged Poses | Typical Duration |
|---|---|---|
| Hatha | Static holds, focus on form | 30-60 seconds |
| Vinyasa | Flowing transitions | 5-15 seconds |
| Iyengar | Props, alignment | Varies |
| Power | Strength focus, repetition | 10-30 seconds |

Credit: yogajala.com
Safety Tips For One-legged Yoga Poses
Balancing can be tricky, especially if you have injuries or joint problems. Here’s how to stay safe:
- Always warm up your ankles, hips, and core before starting.
- Don’t force your leg too high—work within your limits.
- If you feel pain (not just a stretch), come out of the pose.
- Practice on a non-slip surface.
- Pregnant practitioners or those with vertigo should use extra caution and consult a teacher.
If you want more safety guidelines or medical background on balance and falls, you can check resources like Wikipedia: Proprioception.
Building A One-leg Yoga Routine
Integrating one-legged poses into your practice doesn’t have to be complicated. Here’s a simple routine you can try:
- Warm-up: 5 minutes of gentle movement (ankle circles, knee lifts).
- Tree Pose: Hold each side for 30 seconds.
- Standing Figure Four: Hold each side for 30 seconds.
- Warrior III: Hold each side for 20 seconds.
- Dancer’s Pose: Hold each side for 20 seconds.
- Half Moon Pose: Hold each side for 15 seconds.
- Cool-down: Gentle stretches and deep breathing.
Repeat this sequence 2-3 times per week to see real results.

Credit: www.greenappleactive.com
Frequently Asked Questions
What Is The Best One-legged Yoga Pose For Beginners?
Tree Pose is the most accessible for beginners. It allows you to use your toes for support and can be done close to a wall for extra balance.
How Often Should I Practice One-legged Yoga Poses?
Practicing 3-4 times a week is enough for progress, but daily practice (even for a few minutes) will help you improve balance faster.
Why Do I Wobble So Much In These Poses?
Wobbling is normal, especially at the start. Your muscles and nerves need time to learn how to keep you steady. Stay patient and keep practicing.
Can One-legged Yoga Poses Help With Sports Performance?
Yes. They improve balance, core strength, and body awareness, all of which are helpful for athletes in sports like soccer, basketball, or running.
What Should I Do If I Keep Losing My Balance?
First, use a wall or chair for support. Focus on your breath, engage your core, and keep your eyes fixed on a steady spot. Over time, your balance will improve.
Balancing on one leg in yoga is a journey, not a race. With steady practice, you will see real changes in your strength, balance, and even your confidence—both on and off the mat.