Yoga trapeze is a unique tool that can transform your home into a personal wellness space. With this hammock-like device, you can practice aerial yoga, increase flexibility, and build strength—all without leaving your house. But before you start swinging and stretching, you need to set up your yoga trapeze safely and correctly. This guide will walk you through everything: from choosing the right installation spot, understanding the equipment, step-by-step mounting, and expert tips for a secure setup. Whether you are a beginner or an experienced yogi, you’ll find clear instructions and helpful advice to get your yoga trapeze ready for action.
What Is A Yoga Trapeze?
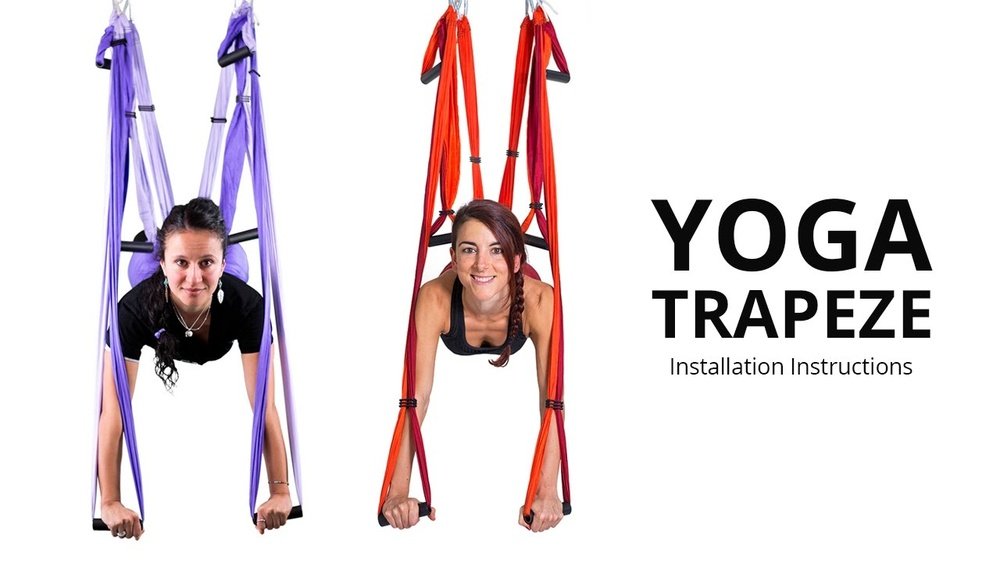
A yoga trapeze is a strong fabric hammock with adjustable handles. It hangs from the ceiling or a support beam, giving you the freedom to perform inverted poses, stretches, and strength exercises. Unlike regular yoga mats, the trapeze lets you use gravity to decompress your spine, improve mobility, and target muscles you can’t reach on the floor.
Most yoga trapezes come with:
- A central hammock (usually made from parachute nylon)
- Three sets of padded handles on each side
- Mounting accessories (carabiners, ropes, or straps)
- Ceiling hooks or mounting brackets (sometimes sold separately)
The key is choosing the right installation method for your space and needs.
Choosing Your Installation Location
Before you buy or set up your yoga trapeze, you need to select the right spot. The ideal location should be:
- Strong and stable (can hold at least 300 pounds)
- Free from obstacles (walls, furniture, light fixtures)
- At least 7–9 feet high (to allow full extension)
- Wide enough (minimum 6 feet by 6 feet space)
Popular installation spots include:
- Ceiling beams: The most secure option, especially in homes with exposed beams.
- Door frames: Only suitable for lightweight or temporary setups.
- Outdoor structures: Like sturdy tree branches, playsets, or pergolas.
- Yoga trapeze stands: Portable and adjustable, perfect for apartments or rented spaces.
Ceiling Vs. Stand: Which Is Better?
Let’s compare the two main installation options:
| Feature | Ceiling Mount | Yoga Trapeze Stand |
|---|---|---|
| Stability | Very strong (if properly installed) | Good, but depends on quality |
| Space required | Permanent spot | Portable, can move |
| Installation | Needs tools and drilling | No drilling, easy assembly |
| Cost | Lower (just hooks and anchors) | Higher (stand price) |
| Safety | Very safe if anchored well | Safe if not overloaded |
Ceiling mounts are best if you want a permanent setup and have a strong beam. Stands are great for flexibility and renters.
Understanding Your Yoga Trapeze Equipment
Before you start mounting, know your gear. A typical yoga trapeze kit includes:
- Hammock: The main seat, usually 98–120 inches wide.
- Handles: Three sets per side, for grip and support.
- Carabiners: Metal clips (locking or non-locking) for attaching the hammock to anchor points.
- Ropes/Straps: Adjustable nylon or polyester, used to suspend the hammock.
- Mounting hardware: Ceiling hooks, screws, or brackets.
Always check the weight limit. Most yoga trapezes can hold up to 300–400 pounds, but some cheaper models may be less robust.
Comparing Yoga Trapeze Kits
Here’s a comparison of three popular kits:
| Brand | Material | Handles | Weight Limit | Included Hardware |
|---|---|---|---|---|
| YogaBody Naturals | Parachute nylon | 3 sets, padded | 400 lbs | Carabiners, straps, ceiling hooks |
| UpCircleSeven | High-strength nylon | 3 sets, foam | 350 lbs | Carabiners, straps |
| EverKing | Silk nylon | 3 sets, rubber | 300 lbs | Carabiners, mounting hardware |
Choose a kit that matches your weight and installation needs. Avoid kits without proper mounting hardware if you plan to install on the ceiling.
Step-by-step Yoga Trapeze Installation
Now let’s walk through the installation process, focusing on ceiling mounting (the most popular method). If you use a yoga trapeze stand, simply follow the stand’s assembly instructions.
1. Gather Tools And Materials
You’ll need:
- Drill (with masonry or wood bits)
- Stud finder (for wooden beams)
- Measuring tape
- Pencil or marker
- Wrench or screwdriver
- Yoga trapeze kit (with hooks/anchors)
2. Locate A Strong Anchor Point
For ceiling mounting, find a wooden beam or concrete ceiling. Never mount on drywall alone—it won’t hold your weight.
- Use a stud finder to locate beams (most are 2×6 or 2×8 inches wide).
- Mark the spot where you’ll install the hooks—at least 30–40 inches apart.
3. Install Ceiling Hooks
Use heavy-duty ceiling hooks or mounting plates.
- Drill holes into the beam or concrete at your marked spots.
- Insert hooks or anchors, tighten until secure.
- If using mounting plates, screw all bolts tightly.
Expert tip: For concrete ceilings, use expansion bolts for extra strength.
4. Attach The Yoga Trapeze
- Clip the carabiners to the hooks or anchor points.
- Attach the straps/ropes to the carabiners.
- Adjust the length so the hammock hangs at hip height (when standing below).
Check everything: Pull down hard to test the stability before use.
5. Adjust Handles And Straps
- Handles should be easy to reach from standing and sitting positions.
- Adjust straps for your height and practice style.
- Make sure all knots, carabiners, and connections are tight.
6. Safety Check
Before your first session:
- Inspect for frayed fabric, loose bolts, or damaged hardware.
- Test every part by gently swinging and applying weight.
- Clear the area of objects that could cause injury.
Non-obvious insight: Always check the ceiling above for water damage or cracks—a weak spot could fail under pressure.

Credit: www.amazon.ae
Common Installation Mistakes To Avoid
Many beginners make errors that can lead to unsafe setups or frustration. Here are mistakes to watch for:
- Mounting on drywall: Drywall cannot hold your weight; always use beams or concrete.
- Incorrect spacing: Hooks too close together limit movement; too far apart strains the fabric.
- Loose hardware: Not tightening hooks or carabiners can cause accidents.
- Ignoring weight limits: Overloading the trapeze or using cheap hardware is dangerous.
- Skipping safety tests: Always pull and swing before using for yoga.
Extra tip: Don’t use regular screws—choose heavy-duty anchors made for ceiling loads.
Tips For A Safe And Effective Practice
After installation, focus on safe and enjoyable use. Here’s how:
- Warm up before each session to avoid injury.
- Start with basic poses—don’t rush into deep inversions.
- Use a yoga mat under the trapeze for comfort and safety.
- Practice near a wall if you are nervous about balance.
- Keep children and pets away from the area during practice.
Advanced tip: If you practice aerial yoga regularly, consider installing padded flooring for extra safety.
Maintenance And Long-term Care
Your yoga trapeze needs regular care to stay safe. Follow these steps:
- Inspect hardware monthly: Check hooks, bolts, and carabiners for rust or wear.
- Clean the hammock: Wash with mild soap and air dry—avoid harsh chemicals.
- Check straps and ropes: Look for fraying, stretching, or weak spots.
- Store indoors: If using outdoors, bring inside after practice to avoid sun or rain damage.
Non-obvious insight: Rotate the mounting hooks every six months—this prevents uneven stress and extends hardware life.
Troubleshooting Installation Problems
Sometimes things don’t go smoothly. Here’s how to solve common issues:
Hammock Too High Or Low
- Adjust strap length or move anchor points.
- Use extension straps if needed.
Handles Hard To Reach
- Check handle placement—should be at shoulder, waist, and knee height.
- Re-adjust straps for your body size.
Hardware Not Tightening
- Use a wrench for extra torque.
- If anchor bolts spin, try slightly larger anchors.
Ceiling Damage
- Stop using immediately.
- Consult a contractor or home expert for repair before reinstalling.
Real-world example: One user found their hammock slowly sagging after several weeks. The issue was a loose anchor bolt—tightening fixed the problem, but regular checks would have prevented it.
Yoga Trapeze Stand Setup
If you can’t install on the ceiling, a stand is a solid solution. Here’s how to set up:
- Unpack all parts and arrange on a flat surface.
- Assemble according to instructions—usually snap-fit or bolt connections.
- Make sure all joints are tight and stable.
- Place the stand in a clear area, away from walls or furniture.
- Hang the trapeze from the top bar using carabiners.
Comparing Stand Types
| Type | Max Height | Portability | Price Range | Best For |
|---|---|---|---|---|
| Steel frame | 8–10 feet | Medium (heavy) | $150–$300 | Home use |
| Collapsible stand | 7–9 feet | High (lightweight) | $100–$250 | Travel, outdoors |
| Wooden stand | 7–9 feet | Low (bulky) | $200–$400 | Permanent setups |
Choose a stand that fits your space and practice style. For frequent moves, collapsible stands are best.
Advanced Installation Tips
For those who want a perfect setup or plan to use their trapeze daily, here are expert techniques:
- Use double anchor points for extra stability—especially for dynamic or swinging poses.
- Add foam padding to the floor and walls nearby.
- Install swivel hooks to allow full rotation.
- If mounting outdoors, use weatherproof hardware.
Expert insight: Consider installing a backup anchor (second set of hooks) for added safety—especially if multiple people use the trapeze.

Credit: www.youtube.com
How Yoga Trapeze Installation Impacts Your Practice
Proper installation is not just about safety—it changes how you use the trapeze. A well-mounted trapeze:
- Makes inversions easier and safer
- Allows deeper stretches and more dynamic movements
- Reduces risk of injury from falls or hardware failure
- Lets you focus on yoga, not worrying about equipment
Statistic: According to YogaBody, nearly 30% of injuries in aerial yoga come from poor installation—not from the poses themselves.
Legal And Insurance Considerations
If you live in a rented apartment, always check your lease before installing hooks or drilling. Landlords may not allow permanent changes. For home setups, some insurance policies cover injuries from exercise equipment, but only if properly installed.
Non-obvious tip: Keep photos and receipts of your installation—this can help with insurance claims if there is ever an accident.
For more information on aerial yoga safety and standards, visit the Wikipedia page on aerial yoga.

Credit: www.wikihow.com
Frequently Asked Questions
How Much Weight Can A Yoga Trapeze Hold?
Most yoga trapeze kits support 300–400 pounds. Always check the label and instructions. Never exceed the stated limit, and remember that weight includes dynamic movement, not just static body weight.
Can I Install A Yoga Trapeze In An Apartment?
Yes, but only if you have strong beams or use a portable stand. Never drill into drywall or ceilings without permission. Portable stands are ideal for renters and can be set up without permanent changes.
What If My Ceiling Is Concrete?
Concrete ceilings are strong, but you’ll need expansion bolts and a masonry drill bit. Install anchors securely and check for cracks or weaknesses before mounting.
Is It Safe To Use The Trapeze Outdoors?
Yes, if you use strong anchor points and weatherproof hardware. Avoid using the trapeze during rain or strong winds. Always check for rust or wear if left outside.
Can Children Use The Yoga Trapeze?
Children can use the trapeze, but always with adult supervision. Adjust the height and handles for their size, and make sure the area is clear and safe.
Setting up your yoga trapeze takes planning, care, and attention to detail. With the right tools and tips, you’ll create a safe, strong, and enjoyable practice space. Remember to check your equipment regularly and follow safety guidelines. This way, you can enjoy the benefits of aerial yoga and build strength, flexibility, and confidence—all from your own home.